How to Change the Number of Processors Used at Boot Up in windows 7/ windows 10
Information
If you have a multiple core CPU (Ex: Intel Core Duo or Quad CPU) or multiple CPUs, then this will show you how to change the Number of Processors that will be used during boot up for troubleshooting and debugging purposes to be able to determine if there is a problem with a single processor/core, or for a programmer to test their code against a single core while running on their multi-core system.
How To do it :
NOTE: Before you do this, you should see what your current boot up time is so you can compare it to what it will be before and after applying this.
1. Open the Start Menu.
2. In the white line (Start Search) area, type msconfig and press Enter.
3. Click Continue in the UAC prompt.
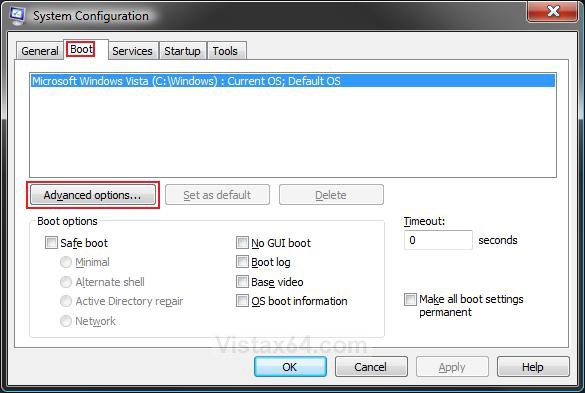
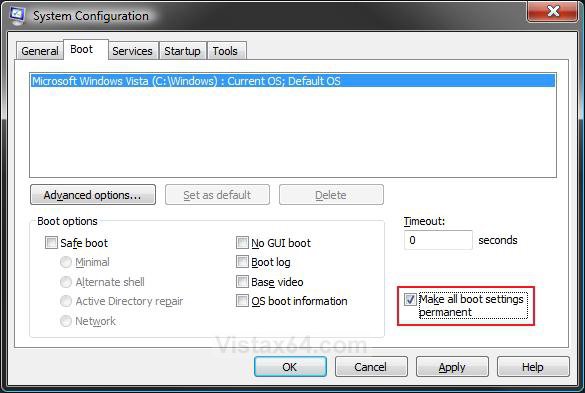
4. Click on the Boot tab. (See screenshot below)
5. Click on the Advanced options button.
6. To Change the Number of Processors at Boot -
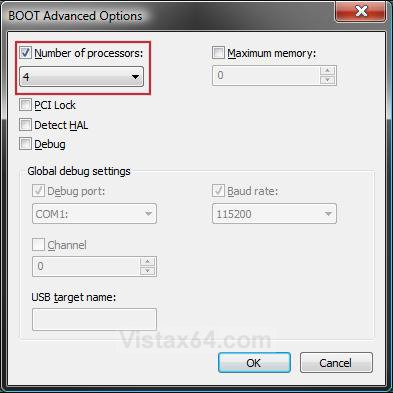
(i) Check the Number of processors box, then click on the drop down arrow and select the number of available processors (cores or CPUs) you want to have used at boot up. (See screenshots below step 7)
NOTE: To test to see if this can speed up your boot time or not, then select the highest number listed for all of the available processors to be used at boot up and check the Detect Hal box.
(ii) Click on OK.
(iii) Go to step 8.
7. To Restore the Default Number of Processors at Boot -
(i) Uncheck the Number of processors box.
(ii) Click on OK.

NOTE: You can restore or make changes to this again later if you want. I will confirm it. Just remember or write down what you had set (checked or unchecked) before if you wanted to restore back to those settings later.
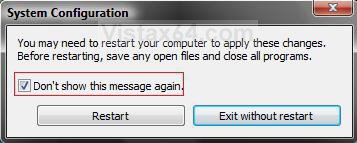
10. Check the Don't show this message again box. (See screenshot below step 11)
NOTE: You will not see this again after checked.
11. Click on the Restart button.
NOTE: If you checked the box and want to restore this Restart box, see: How to Restore the System Configuration Restart Prompt in Vista
WARNING: This will restart the computer immediately. Make sure you save and close anything open you do not want to lose.
Information
If you have a multiple core CPU (Ex: Intel Core Duo or Quad CPU) or multiple CPUs, then this will show you how to change the Number of Processors that will be used during boot up for troubleshooting and debugging purposes to be able to determine if there is a problem with a single processor/core, or for a programmer to test their code against a single core while running on their multi-core system.
Note
Vista will use all your processors by default at boot up without this Number of Processors setting box checked. Using all of your available processors (cores or CPUs) durring boot allows the computer to boot faster only because a multiple core CPU or multiple CPUs can handle and do more at once than a single core or CPU. Multiple cores do not actually increase the speed, but only increase the number of processor cores working on the job which in turn has the job finish quicker. If you do not have much running at startup, then you may not notice much improvement in how long it takes to startup.
Tip
People have reported that by checking this setting and selecting all of their available CPUs, they have seen a performance increase in boot up speed despite the Noteabove . See the example below. If it does not help, then you can do step 7 to undo this and go back to the default settings.
People have reported that by checking this setting and selecting all of their available CPUs, they have seen a performance increase in boot up speed despite the Noteabove . See the example below. If it does not help, then you can do step 7 to undo this and go back to the default settings.
Warning
Selecting a lower amount of processors to use at boot up than you actually have can increase the amount boot up time causing a longer boot.
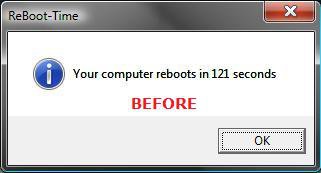
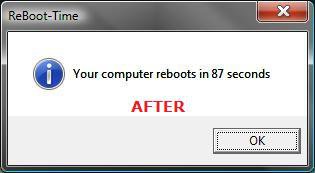
EXAMPLE: Boot Up Time Before and After
NOTE: This is the before and after boot up time for my computer after I changed it to use all 4 cores. For fun you can post your results here: ReBoot Time
Selecting a lower amount of processors to use at boot up than you actually have can increase the amount boot up time causing a longer boot.
EXAMPLE: Boot Up Time Before and After
NOTE: This is the before and after boot up time for my computer after I changed it to use all 4 cores. For fun you can post your results here: ReBoot Time


How To do it :
NOTE: Before you do this, you should see what your current boot up time is so you can compare it to what it will be before and after applying this.
1. Open the Start Menu.
2. In the white line (Start Search) area, type msconfig and press Enter.
3. Click Continue in the UAC prompt.
4. Click on the Boot tab. (See screenshot below)
5. Click on the Advanced options button.

6. To Change the Number of Processors at Boot -
(i) Check the Number of processors box, then click on the drop down arrow and select the number of available processors (cores or CPUs) you want to have used at boot up. (See screenshots below step 7)
NOTE: To test to see if this can speed up your boot time or not, then select the highest number listed for all of the available processors to be used at boot up and check the Detect Hal box.
(ii) Click on OK.
(iii) Go to step 8.
7. To Restore the Default Number of Processors at Boot -
(i) Uncheck the Number of processors box.
(ii) Click on OK.


8. Check the Make all boot settings permanent box and click on OK. (See screenshot below)
NOTE: If you do not check this, then you will Selective startup dotted instead of Normal startup under the General tab. You can still make changes again by checking this again after any changes.
8. Check the Make all boot settings permanent box and click on OK. (See screenshot below)
NOTE: If you do not check this, then you will Selective startup dotted instead of Normal startup under the General tab. You can still make changes again by checking this again after any changes.

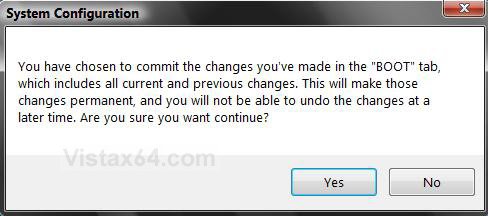
9. Click on Yes at the confirmation window. (See screenshot below)NOTE: You can restore or make changes to this again later if you want. I will confirm it. Just remember or write down what you had set (checked or unchecked) before if you wanted to restore back to those settings later.

10. Check the Don't show this message again box. (See screenshot below step 11)
NOTE: You will not see this again after checked.
11. Click on the Restart button.
NOTE: If you checked the box and want to restore this Restart box, see: How to Restore the System Configuration Restart Prompt in Vista
WARNING: This will restart the computer immediately. Make sure you save and close anything open you do not want to lose.

12. After you have started back to the desktop, you can check to see what your new boot up time is for fun.


0 comments:
Post a Comment